Tired of searching for authentic clotted cream? Make it yourself!
There’s something truly special about indulging in a proper cream tea, isn’t there? I remember the first time I tried to recreate that quintessential English experience at home, only to be frustrated by how hard it was to find good clotted cream. Store bought versions often fall flat, lacking that rich, golden crust and incredible creamy texture.
But what if I told you the secret to making a truly authentic, Traditional Style Clotted Cream is incredibly simple, requiring just one ingredient and a little patience? This foolproof recipe will solve your clotted cream woes and elevate your homemade cream teas to legendary status.
Why You Need This Traditional Clotted Cream Recipe?
Making clotted cream from scratch feels like a culinary superpower. It transforms a humble ingredient into something luxurious and utterly divine. You might think it’s complicated, but I promise you, it’s mostly hands-off time. The reward is a thick, spoonable cream with a distinctive nutty flavor and a delicate, slightly firm crust that just melts in your mouth.
This Clotted Cream Recipe is perfect for those cozy weekend mornings or when you want to impress guests without breaking the bank. It brings a touch of English countryside charm right into your kitchen. Trust me, once you try homemade, there’s no going back.
What You Will Need
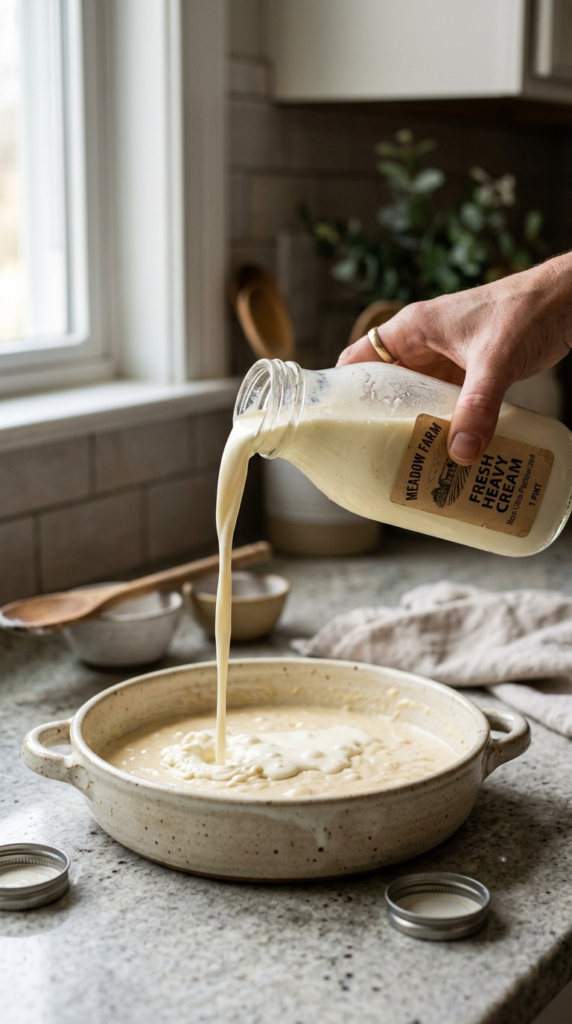
The beauty of this recipe lies in its simplicity. You only need one key ingredient: high-quality heavy cream.
For the best results, use cream that is not ultra-pasteurized. Ultra-pasteurized cream has been heated to a very high temperature, which can interfere with the clotting process. Look for pasteurized or “jersey” cream if possible. The fat content is crucial here; it needs to be at least 35% (or 48% double cream in the UK) to achieve that signature thickness and crust.
You’ll also need a shallow baking dish, like a ceramic pie dish or an oven-safe casserole dish, to maximize the surface area for that gorgeous clotted crust.
How To Make This Traditional Clotted Cream?
Making clotted cream is more about patience than skill. The process involves gently baking cream for several hours, allowing a thick crust to form as the fat separates and rises to the surface.
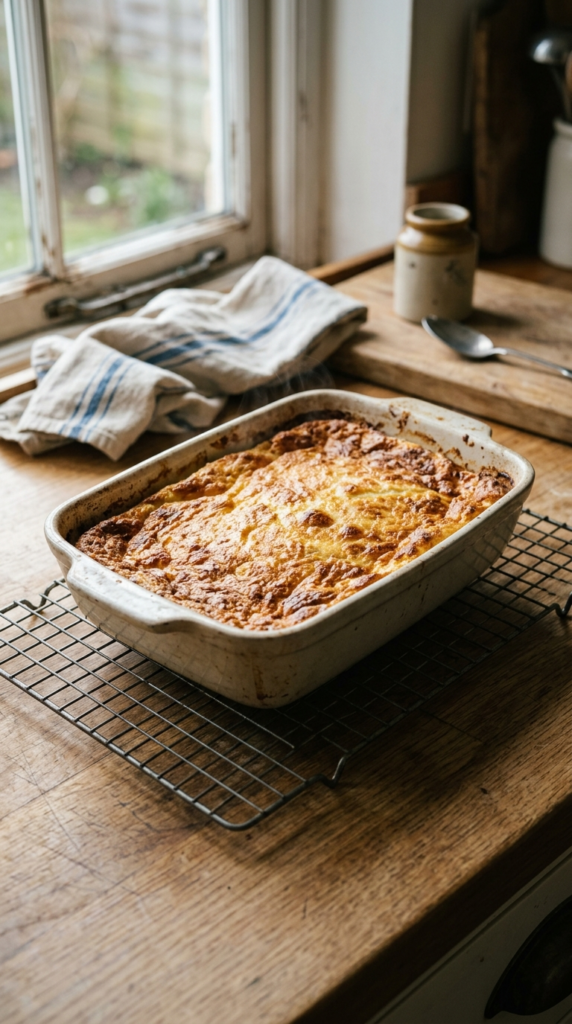
First, pour your heavy cream into a shallow oven-safe dish. You want the cream to be no more than about an inch deep. This helps with the crust formation. Then, place it into a very low oven, typically between 180°F to 200°F (82°C to 93°C), and let it bake for anywhere from 8 to 12 hours. Yes, it’s a long bake, but the magic happens almost entirely on its own.
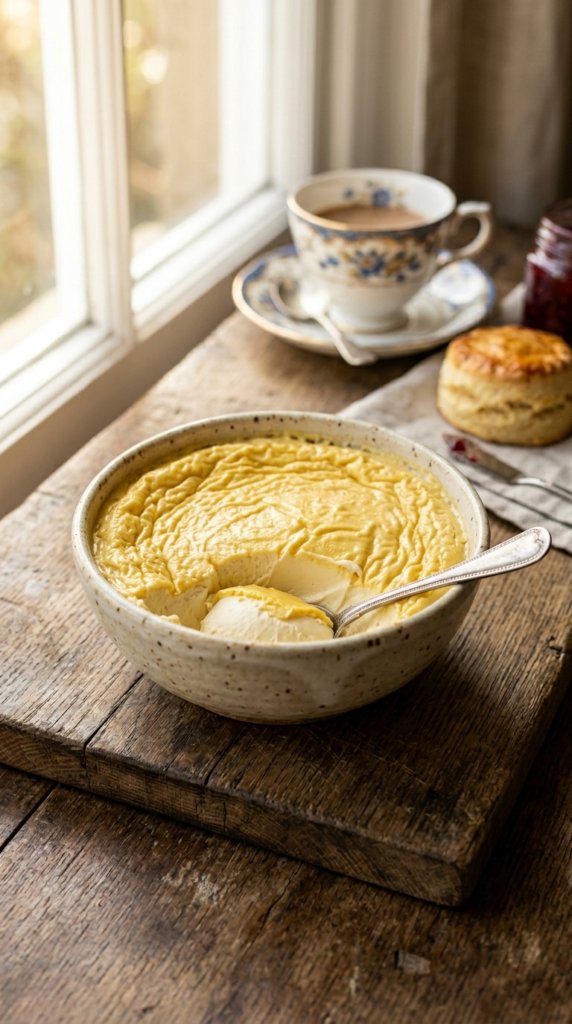
You’ll know it’s ready when a thick, yellowish crust has formed all over the top, and the cream underneath looks thick and glossy. Let it cool completely to room temperature, then chill it in the fridge for at least 8 hours, or preferably overnight, before skimming off the clotted cream.
Homemade Clotted Cream
Prep Time: 5 minutes
Cook Time: 8-12 hours
Cooling/Chill Time: 8 hours+
Total Time: ~16-20 hours
Ingredients
- 4 cups (about 1 liter) heavy cream (at least 35% fat, not ultra-pasteurized)
Instructions
- Preheat your oven to 180°F (82°C). If your oven runs hot, you can go as low as 170°F (77°C). The key is a very low, slow heat.
- Pour the heavy cream into a shallow, oven-safe baking dish (a ceramic pie plate or casserole dish works well). Ensure the cream is no more than 1 inch (2.5 cm) deep.
- Carefully place the dish of cream into the preheated oven.
- Bake for 8 to 12 hours. Do not stir or disturb the cream during this time. The longer it bakes, the thicker the crust and cream will become. A beautiful golden-yellow crust should form over the entire surface, and the cream underneath will look thick and slightly glossy.
- Once baked, turn off the oven and leave the cream inside to cool gradually for at least 3-4 hours, or until it reaches room temperature. This slow cooling helps prevent cracking and ensures a creamy consistency.
- Once completely cool, cover the dish with plastic wrap and transfer it to the refrigerator. Chill for at least 8 hours, or preferably overnight. This chilling process is essential for the cream to set properly.
- The next day, use a spoon or spatula to gently lift the thick, clotted layer from the top of the dish. This is your clotted cream! You can discard any remaining liquid (which is similar to buttermilk, but thinner).
- Transfer the clotted cream to an airtight container. It’s now ready to enjoy!
My Top Kitchen Tips for Perfect Clotted Cream
Over the years, I’ve learned a few tricks that make all the difference. Always use the freshest, highest-fat cream you can find. It truly impacts the final texture and flavor. Don’t be tempted to open the oven door during baking; consistent, low heat is your friend. Patience during the cooling and chilling phase is also key. It’s hard to wait, but essential for the cream to set properly.
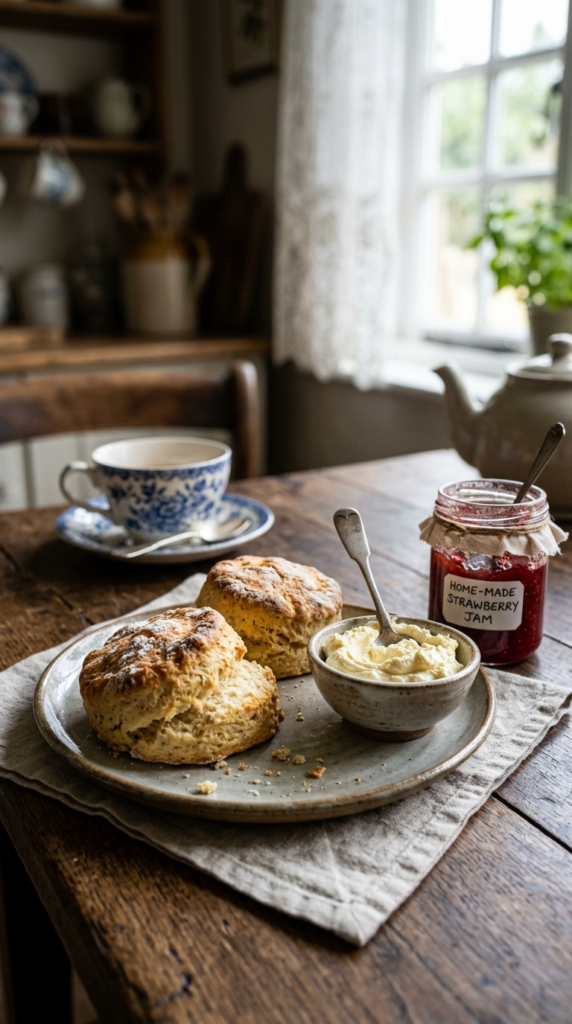
Once you have your homemade clotted cream, you absolutely must serve it the traditional way: with fresh, warm scones. There’s nothing quite like it.

Serving and Storage Suggestions
Your homemade clotted cream is best enjoyed within 3-4 days when stored in an airtight container in the refrigerator. I love serving it generously on warm scones, usually with a dollop of homemade strawberry jam or a zesty lemon curd. It’s also delightful with fresh berries or as a luxurious topping for fruit tarts.
While some people try to freeze clotted cream, I find that it can sometimes affect the texture. If you must freeze it, do so in small portions, and be aware that it might be slightly less firm once thawed. For the best experience, plan to make and enjoy it fresh.
There you have it – your guide to making truly authentic clotted cream right in your own kitchen. It’s a simple pleasure that brings so much joy, and I truly hope you give it a try. There’s nothing quite like knowing you’ve created that luxurious, velvety texture and rich flavor from scratch. Imagine the smiles when you serve this with your next afternoon tea!
Don’t forget to save this Clotted Cream Recipe for later! Pin it on Pinterest and share it with a friend who loves a good cream tea as much as you do. Happy baking!