This dessert is about to become your family’s favorite freezer treat!
Ever have those days where the craving for something sweet hits hard, but the thought of turning on the oven is just too much? I know exactly what you mean. Sometimes you need a show-stopping dessert that doesn’t demand hours of baking or complicated steps.
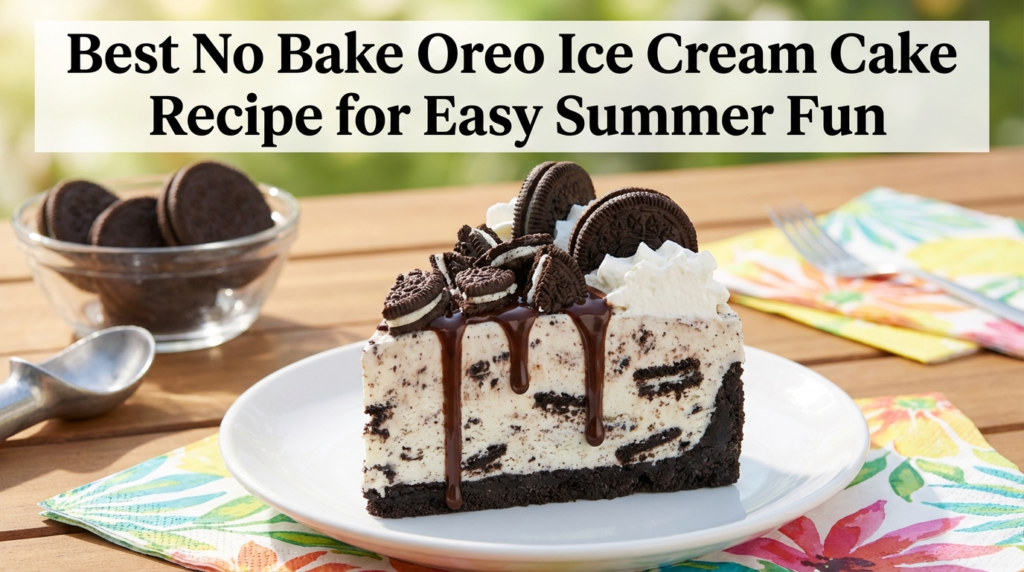
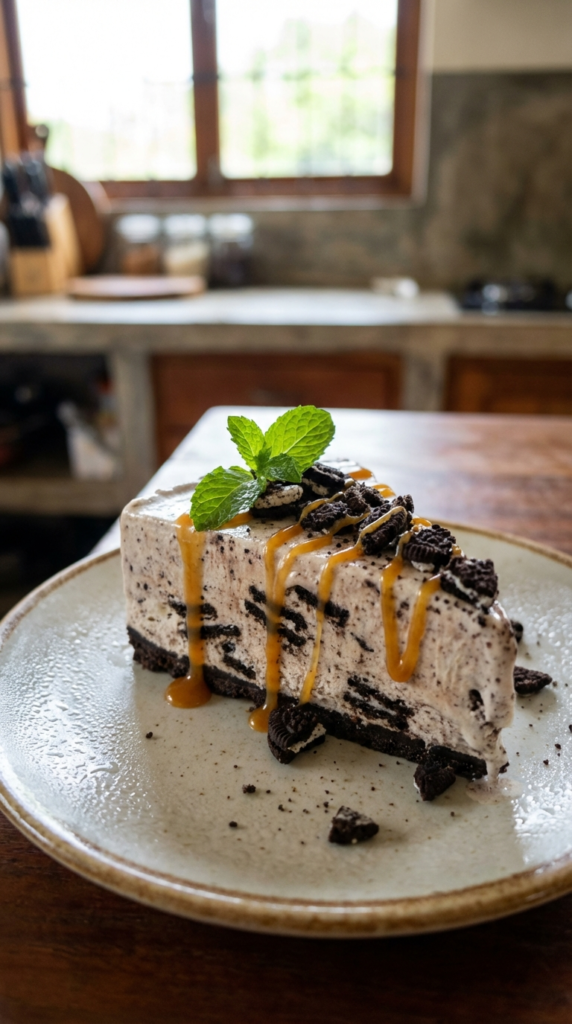
That’s where my go-to Oreo Ice Cream Cake Recipe comes in. It’s incredibly simple to assemble, perfectly creamy, and a total crowd-pleaser that you can make ahead of time for any occasion.
Why You Will Love This Oreo Ice Cream Cake
This isn’t just another dessert; it’s an experience. My Oreo Ice Cream Cake is the kind of recipe you’ll keep in your back pocket for potlucks, birthdays, or just a Tuesday night when you need a little joy. It truly delivers on big flavor with minimal effort.
What makes it so special? It’s the irresistible combination of crunchy Oreo crust, creamy vanilla ice cream, and rich chocolate fudge, all layered together in a dreamy, make-ahead treat. Plus, it’s completely no-bake, which is a lifesaver on warm days or when you just don’t feel like heating up the kitchen.
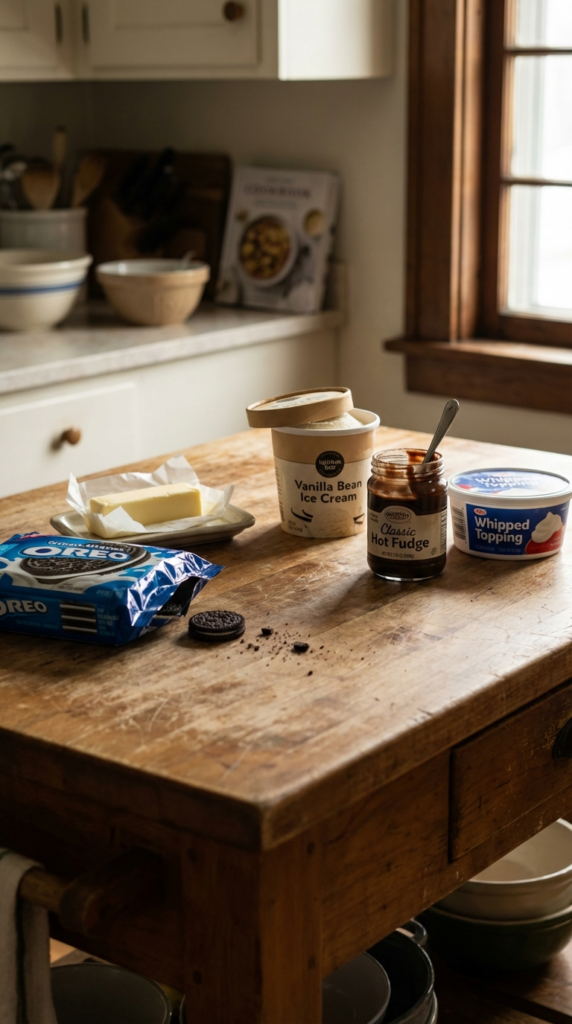
Ingredients You Need for Your Ice Cream Cake
You’ll be surprised how few ingredients it takes to create such an impressive dessert. You likely have most of these on hand already!
* 24 Oreo cookies (about 1 package)
* 6 tablespoons unsalted butter, melted
* 1.75 quarts (about 1.6 liters) vanilla ice cream, softened
* 1 cup hot fudge topping, softened
* 1 (8 ounce) container whipped topping (like Cool Whip), thawed
* Extra Oreo cookies, chopped, for garnish (optional)
How To Make This Easy Oreo Ice Cream Cake
Making this cake is surprisingly straightforward, and it’s a fun project to do with kids too! The key is working quickly and allowing enough freezing time between layers for the best results.
Oreo Ice Cream Cake Recipe
Prep Time: 20 minutes
Cook Time: 0 minutes
Total Time: 4 hours (plus freezing)
Servings: 8-10
Ingredients
- 24 Oreo cookies (about 1 package)
- 6 tablespoons unsalted butter, melted
- 1.75 quarts (about 1.6 liters) vanilla ice cream, softened
- 1 cup hot fudge topping, softened
- 1 (8 ounce) container whipped topping (like Cool Whip), thawed
- Extra Oreo cookies, chopped, for garnish (optional)
Instructions
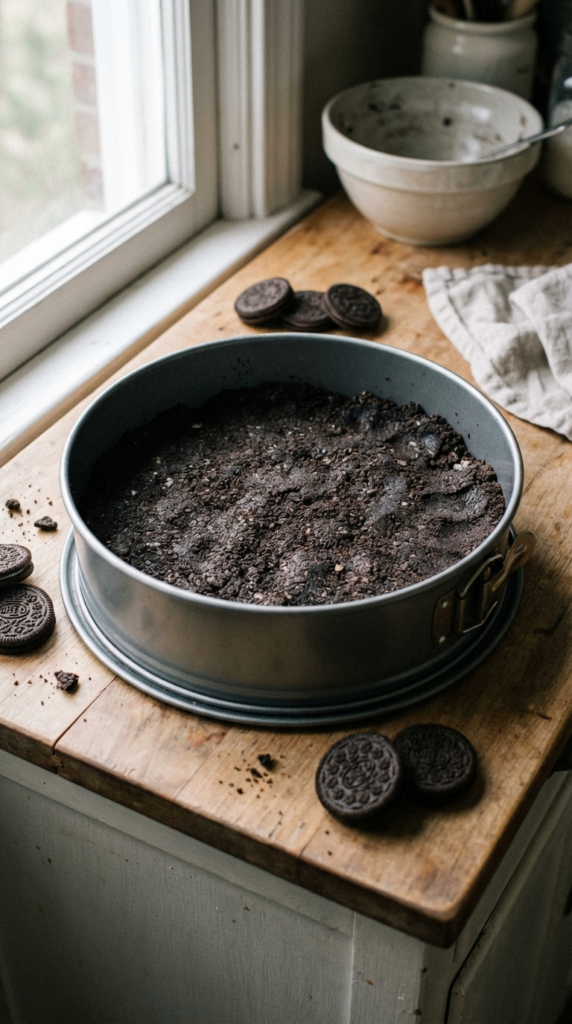
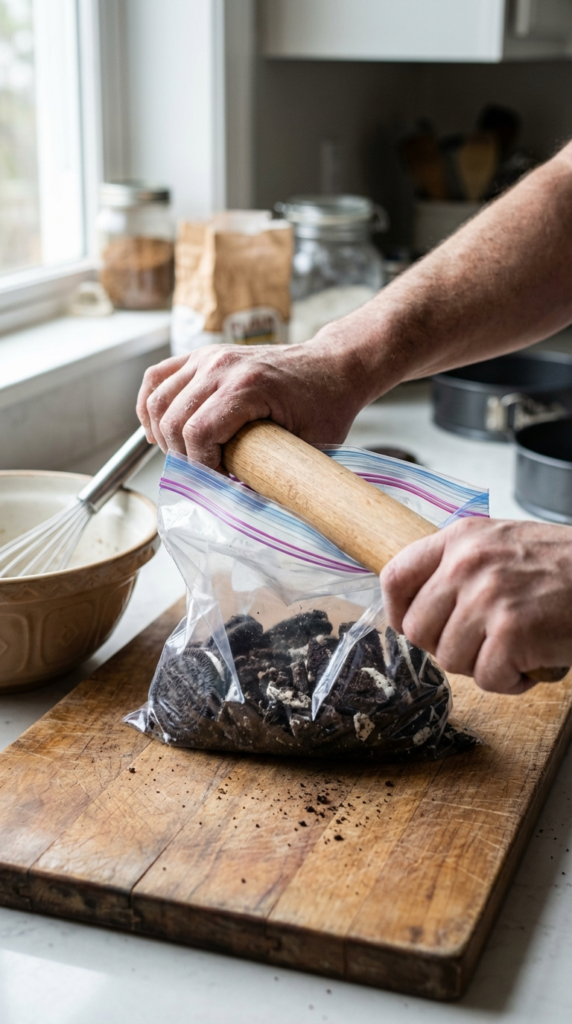
- Prepare the Crust: Finely crush 24 Oreo cookies. You can use a food processor or place them in a zip-top bag and crush with a rolling pin. In a medium bowl, combine the crushed Oreos with the melted butter.
- Form the Base: Press the Oreo mixture firmly into the bottom of a 9-inch springform pan. Use the back of a spoon or the bottom of a glass to create an even, compact layer. Place the pan in the freezer for at least 15-20 minutes to set the crust.
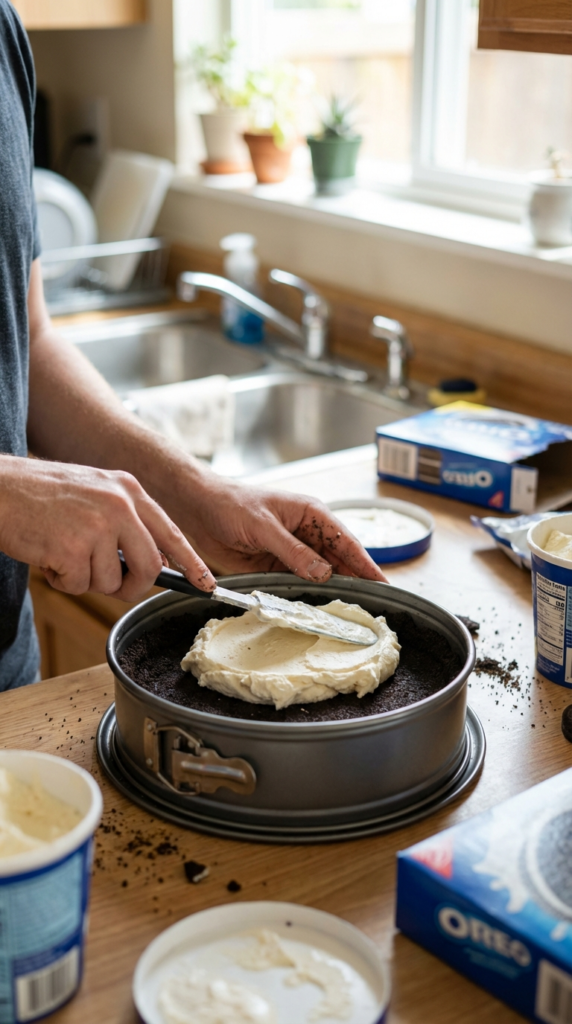
- Layer the Ice Cream: Once the crust is firm, spread the softened vanilla ice cream evenly over the Oreo crust. It helps to use an offset spatula for a smooth layer. Return the pan to the freezer for at least 1 hour, or until the ice cream is firm.
- Add Fudge: Warm the hot fudge topping slightly if it’s too thick. Drizzle or spread the hot fudge over the frozen ice cream layer. You can make swirls with a knife if you like! Place back in the freezer for another 30 minutes to firm up.
- Top with Whipped Topping: Spread the thawed whipped topping evenly over the fudge layer.
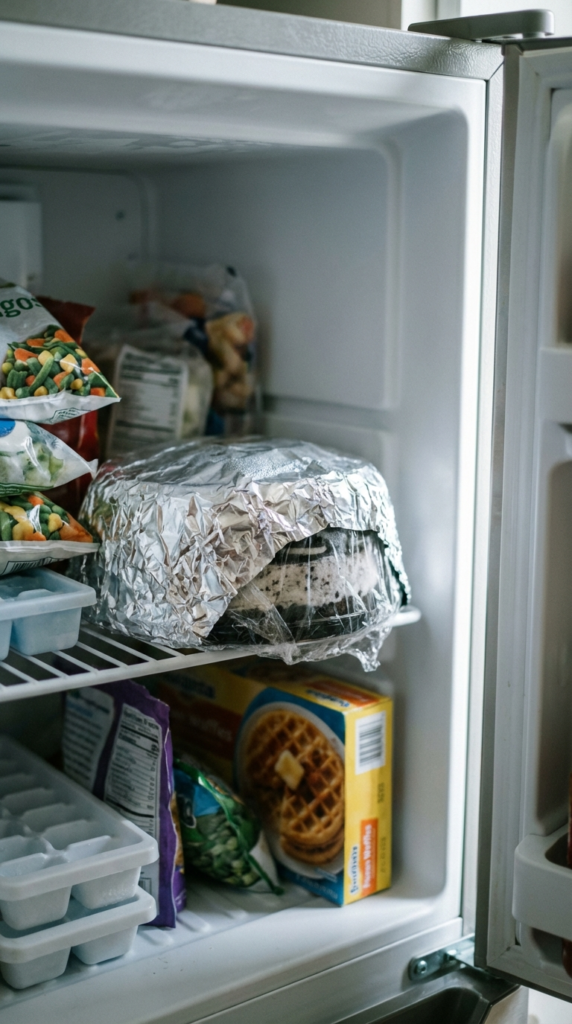
- Final Freeze: Cover the cake loosely with plastic wrap and freeze for at least 2-3 hours, or until completely firm. For best results, I often let it freeze overnight.
- Serve: When ready to serve, remove the cake from the freezer and let it sit at room temperature for 5-10 minutes to soften slightly. Carefully run a thin knife around the edge of the springform pan before releasing the sides. Garnish with chopped Oreos, if desired. Slice and enjoy!
My Kitchen Tips for a Perfect Frozen Dessert
Through many iterations of this recipe, I’ve picked up a few tricks that make a big difference.
- Soften Smartly: Don’t let your ice cream melt completely; you want it soft enough to spread easily, but still firm. A quick 10-15 minutes on the counter is usually enough. If it gets too soupy, it will refreeze with an icy texture.
- Crushing Oreos: For the finest crumbs that make a solid crust, a food processor is your best friend. If you don’t have one, place the cookies in a sturdy freezer bag and smash them with a rolling pin. Just be thorough!
- Pre-chill Your Bowl: If you’re using a stand mixer to soften ice cream or even whip fresh cream for a variation, chill the bowl first. It helps keep everything cold and firm.
- The Right Pan: A springform pan is essential for easy removal and those beautiful, clean layers. Make sure the bottom is secure before pressing in your crust!
- Hot Fudge Hack: If your hot fudge is too stiff to spread, warm it gently in the microwave for 15-20 seconds. This makes it smooth and easy to drizzle.
Storage and Make Ahead Options
One of the best things about this Oreo Ice Cream Cake is how freezer-friendly it is. It’s truly a perfect make-ahead dessert!
Once assembled and fully frozen, cover the cake tightly with plastic wrap and then a layer of aluminum foil. This dual protection helps prevent freezer burn and keeps your cake fresh. It will keep beautifully in the freezer for up to 2 weeks. Just remember to give it 5-10 minutes on the counter before slicing to ensure it’s perfectly scoopable.
Fun Variations and Toppings
While the classic Oreo Ice Cream Cake is fantastic, don’t be afraid to experiment!
- Flavor Swap: Instead of vanilla, try mint chip, chocolate, strawberry, or even coffee ice cream.
- Extra Crunch: Mix in some mini chocolate chips, chopped nuts, or even more crushed Oreos into the ice cream layer.
- Sauce It Up: Drizzle with caramel sauce, white chocolate ganache, or a berry coulis for extra flair.
- Fresh Whipped Cream: For an even richer top layer, substitute homemade whipped cream for the thawed whipped topping.
- Cheesecake Swirl: For an indulgent twist, try layering a thin spread of no bake cheesecake filling over the crust before the ice cream!
This Oreo Ice Cream Cake recipe is a true winner in my kitchen, and I know it will be in yours too. It’s simple, delicious, and perfectly customizable for any occasion. Give it a try this week!
I truly hope you and your loved ones enjoy this frozen treat as much as my family does. If you make it, please let me know your favorite part in the comments below! Don’t forget to save this recipe for later – pin it to your dessert board and share the love with a friend!