Stop the car because that famous cookies and cream craving just met its match in your very own blender. We have all been there on a Sunday afternoon, pulling into a silent drive-thru only to remember with a heavy heart that the gates are closed. It is a universal heartbreak for fans of that thick, creamy, cookie-filled dream. But honestly, even on a Monday, the version you can whip up at home is remarkably better. It is richer, thicker, and packed with way more cookie chunks than any fast-food machine could ever handle.
I remember the first time I tried to replicate this at home. I used cheap ice cream and way too much milk, resulting in a sad, runny mess that tasted more like vanilla milk with a hint of chocolate. I was determined to fix it. After dozens of batches and a very happy family of taste-testers, I finally cracked the code. The secret is not just in the ingredients but in the temperature and the technique. This recipe captures that nostalgia but turns the volume up on the quality. You are about to become the most popular person in your household.
Making a restaurant-quality shake is about more than just hitting a button on a machine. It is about the sensory experience. It is the sound of the cookies cracking under the blades, the sight of the dark chocolate swirls against the snowy white cream, and that first brain-freezing sip that makes the world stand still. Let’s look at how to get that perfect consistency every single time.
Why This Copycat Beats The Drive Thru
The main reason this version wins is the quality of the base. Fast food joints often use a “dairy dessert” or a low-fat soft serve mix that comes out of a pressurized machine. While it’s tasty, it lacks the depth of a premium, high-fat vanilla bean ice cream. When you make this at home, you have total control over the “cookie-to-cream” ratio. If you want a shake that is practically a meal of cookies, you can have it. No more searching for that one elusive piece of chocolate wafer at the bottom of the cup.
Another factor is the freshness. In a busy kitchen, machines are running constantly, and sometimes the mix can get a bit airy or melted. At home, you are using rock-solid ice cream straight from the freezer. This allows for a much thicker texture that stays cold longer. Plus, you can avoid the artificial stabilizers and preservatives found in commercial mixes. It feels more indulgent because it actually is more indulgent. You are using real cream, real sugar, and real vanilla.
I also love that I can customize the sweetness. Some days I want a hint of salt to balance the sugar, or maybe a splash of peppermint extract during the holidays. This recipe serves as your foundation. Once you master the thickness, the flavor variations are endless. You can even explore other No Bake Oreo Desserts Your Family Will Absolutely Rave About to keep the cookie party going all week long.
Choosing Your Ice Cream Base
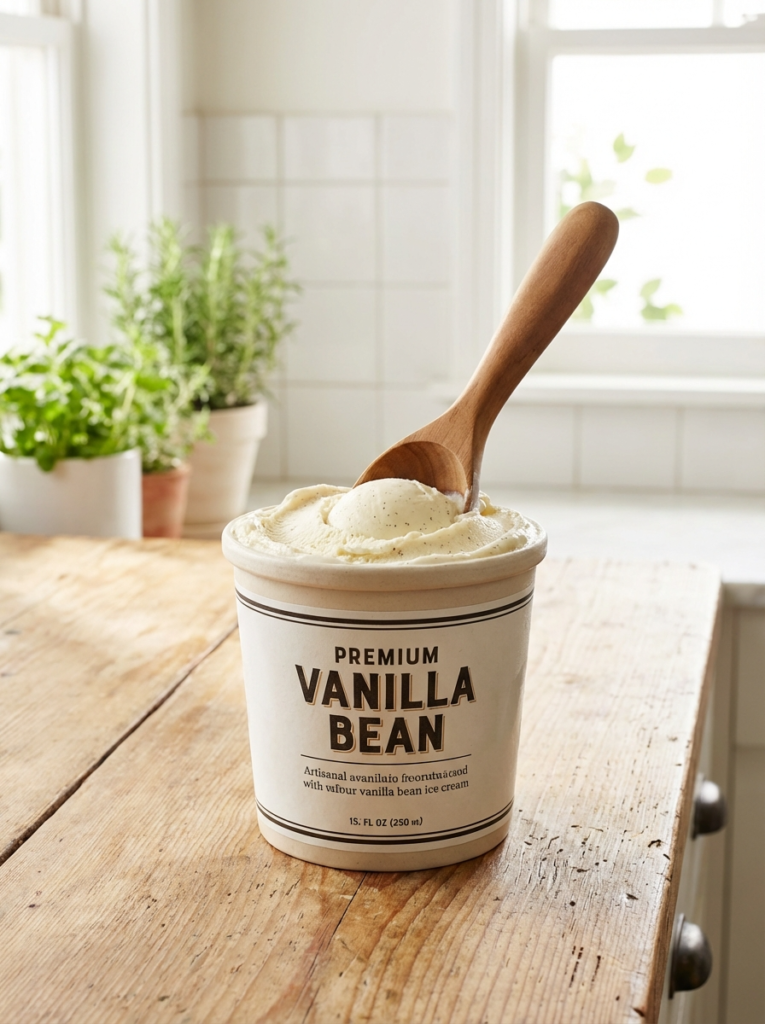
If you want a shake that rivals a professional creamery, do not skimp on the ice cream. Look for a brand that lists “cream” as the first ingredient, not “milk” or “water.” A French vanilla or a double vanilla bean works best because the flavor is strong enough to stand up against the heavy chocolate of the Oreos. If the ice cream is too light or airy (often called “churned” or “light”), the shake will collapse and become watery within minutes.
The temperature of the ice cream is equally important. I always suggest letting your pint sit on the counter for about five minutes before scooping. This softens the edges just enough so that you do not have to add an excessive amount of milk to get the blender moving. The less milk you use, the thicker the shake. If you find yourself needing a lot of liquid to get things blending, your ice cream was likely too hard, or your blender might need a little help from a tamper.
For those who love the process of making things from scratch, using a homemade base is the peak of this experience. You can check out some Creamy Dreamy Easy Ice Cream Maker Recipes You’ll Make All Summer to create a custom vanilla that is specifically designed for milkshakes. A homemade custard-style ice cream makes this shake so rich it’s almost like drinking velvet.
The Cookie To Cream Ratio
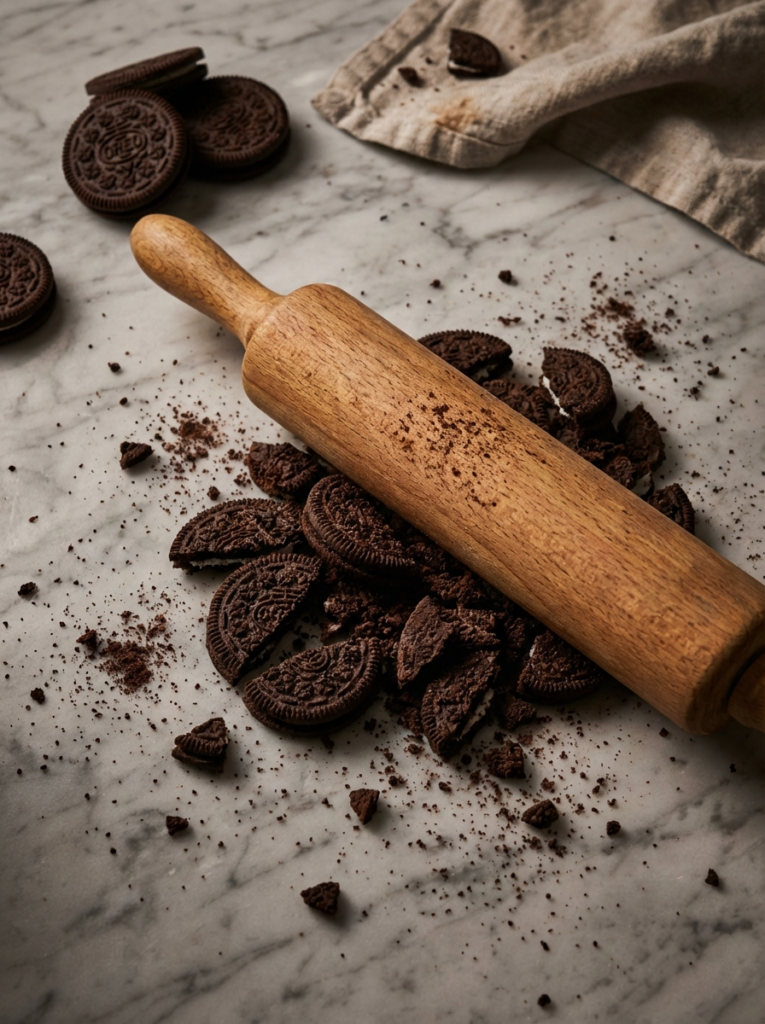
Finding the perfect balance of cookies is an art form. Most people make the mistake of throwing the cookies in at the very beginning with the ice cream and milk. This results in a grey-colored shake with no texture. The secret to that professional look is the two-step blend. You want some cookies pulverized into the base for flavor, and some added at the very end for that signature crunch.
I typically use about four to five cookies per serving. I put three in the blender initially to create that beautiful speckled grey base. Then, I hand-crush the remaining two and pulse them in for only a second or two at the very end. This ensures that every sip has a bit of bite. It is that contrast between the smooth, freezing cream and the crunchy, slightly salty cookie that makes this recipe a winner.
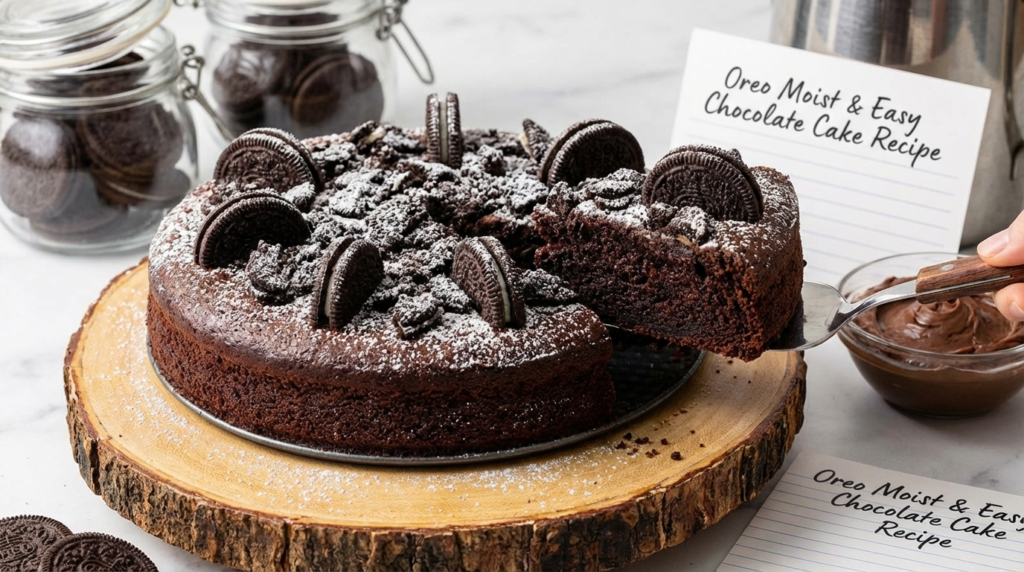
If you have leftovers (though I doubt you will), you can actually use this same flavor profile for other treats. I’ve often taken the inspiration from this shake and applied it to an Ice Cream Cake Recipe with Oreos (Layered Dessert Guide) for birthday parties. The combination of vanilla and chocolate sandwich cookies is truly timeless and appeals to everyone from toddlers to grandparents.
Pro Secrets For A Thicker Shake
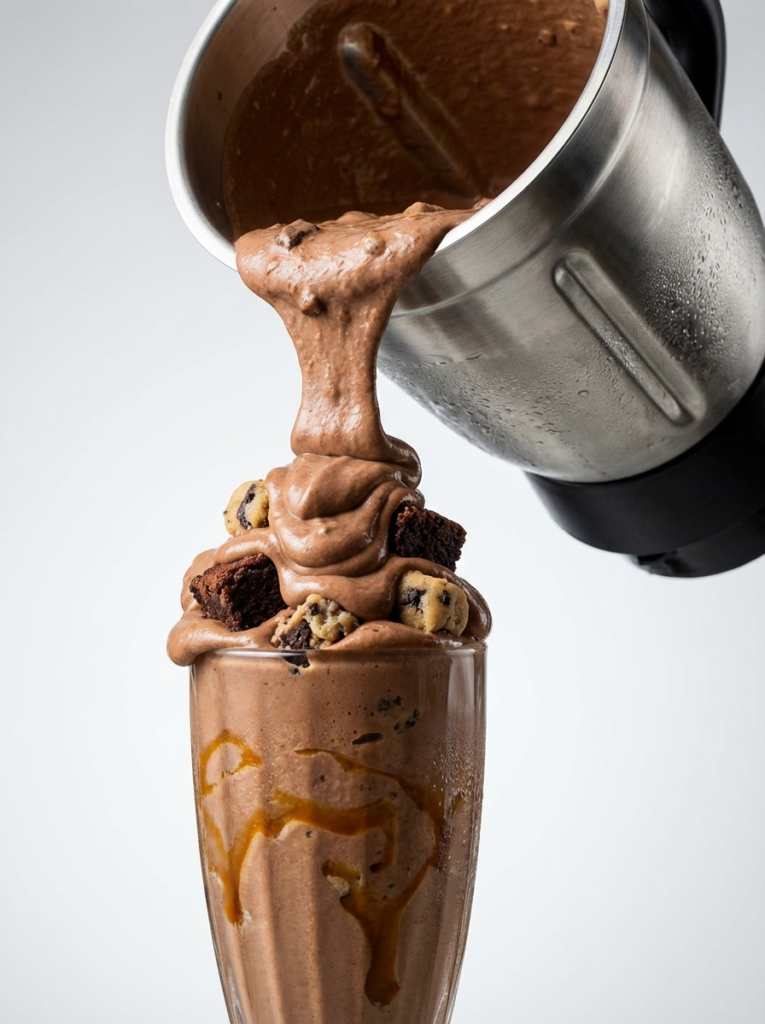
To get that “stand your spoon up” thickness, you have to be disciplined with your liquid. I always start with just a quarter cup of whole milk. You can always add more, but you can’t take it back once the shake is runny. Use whole milk for the best mouthfeel; skim or 1% milk will make the shake feel thin and icy. For an even more decadent version, some of my fellow foodies swear by using heavy cream or half-and-half instead of milk.
Another trick is to chill your glasses in the freezer for at least twenty minutes before serving. A room-temperature glass will immediately start melting the edges of your shake, turning your thick masterpiece into a puddle. A frosted glass keeps the shake at that perfect, semi-solid consistency until the very last drop. It also just looks incredibly professional and makes the experience feel like a real treat.
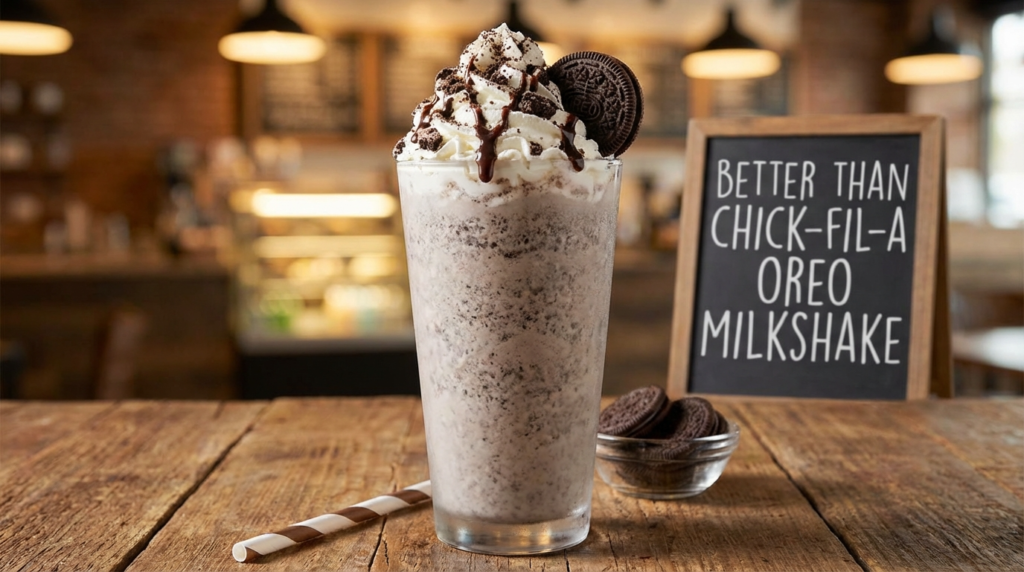
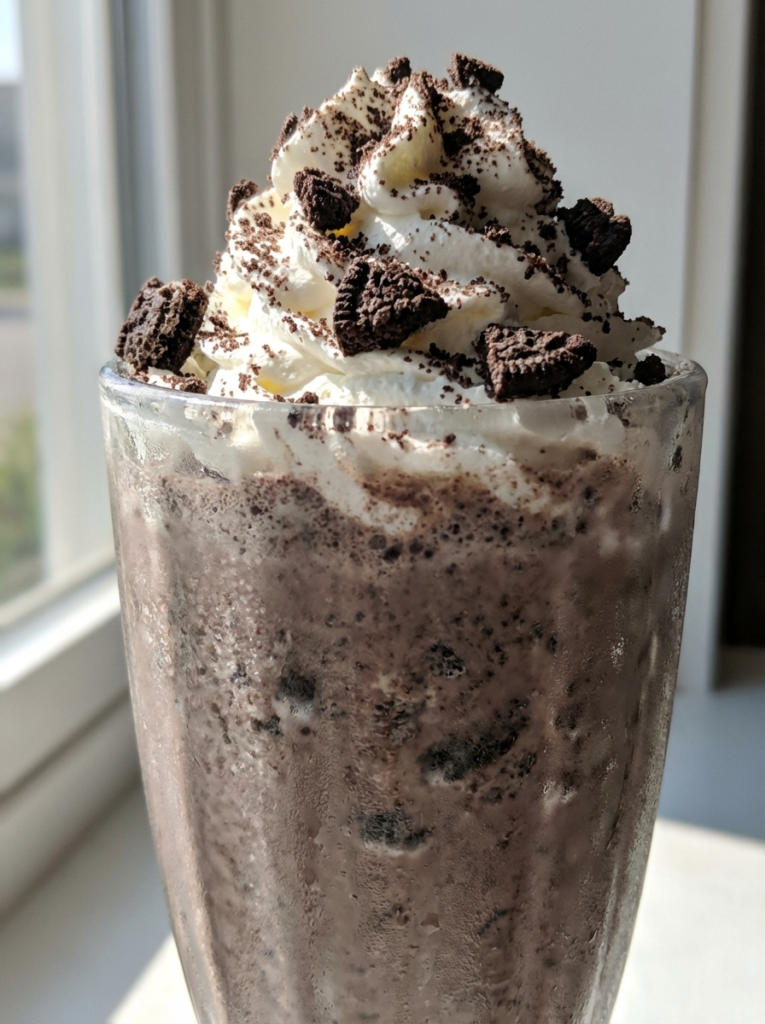
Finally, don’t forget the garnish. A real Chick-Fil-A shake always comes with whipped cream and a cherry. I like to make my own whipped cream with a touch of sugar and vanilla, then top it with a whole Oreo. It’s all about the presentation. When you bring this out to your friends or family, they should gasp. It should look like it belongs on a billboard.
Better Than Chick Fil A Oreo Milkshake Recipe
Prep Time: 5 Mins | Cook Time: 0 Mins | Total Time: 5 Mins | Servings: 1 large shake
Ingredients
- 3 large scoops premium vanilla bean ice cream (approx. 1.5 cups)
- 1/3 cup whole milk (adjust for desired thickness)
- 5 Oreo cookies (divided)
- 1/2 teaspoon pure vanilla extract
- Pinch of salt (optional, to bring out the chocolate flavor)
- Whipped cream and an extra cookie for topping
Instructions
- Place your serving glass in the freezer to chill while you prepare the ingredients.
- In a high-powered blender, combine the vanilla ice cream, milk, vanilla extract, and a tiny pinch of salt.
- Add 3 Oreo cookies to the blender.
- Blend on medium-high speed until the mixture is smooth and the cookies are fully incorporated into the base. If the blender struggles, add one tablespoon of milk at a time until it moves.
- Add the remaining 2 Oreo cookies. Pulse the blender 2 or 3 times just to break them into chunks. Do not over-blend at this stage!
- Remove your chilled glass from the freezer. Pour the thick milkshake into the glass.
- Top generously with whipped cream, cookie crumbs, and a whole Oreo. Serve immediately with a wide-diameter straw.
Pro-tips and Notes
- Dairy-Free Option: Use a high-quality oat milk ice cream and coconut milk for a surprisingly similar texture.
- Extra Thick: Replace the milk with heavy cream for a “premium” version that is incredibly rich.
- Cookie Varieties: Try using Golden Oreos or Double Stuf to change the flavor profile to your liking.
Wrapping Up This Cookies And Cream Dream
There is something incredibly satisfying about mastering a restaurant favorite in your own kitchen. This Better-Than-Chick-Fil-A Oreo Milkshake is more than just a drink; it is a small win for home cooks everywhere. You no longer have to worry about long lines, closed signs, or melting shakes on the drive home. You have the power to create the perfect dessert whenever the craving strikes.
The best part about this recipe is seeing the smiles it brings. Whether it is a late-night treat for yourself or a surprise for the kids, it always hits the spot. The texture is superior, the flavor is deeper, and the cookies are plentiful. It truly is the top-tier way to enjoy the classic combination of chocolate and vanilla.
If you loved this recipe, please save it to your favorite Pinterest board so you can find it next time that Sunday craving hits! Share your creations with me on social media—I love seeing your thick, cookie-packed shakes. Happy blending!
More Oreo Milkshake Ideas
Compare this version with the 5-minute Oreo milkshake, diner-style Oreo milkshake, and no-blender Oreo milkshake.