Forget store-bought! This is the ice cream you’ll make all summer (and winter) long!
There’s nothing quite like the creamy, dreamy taste of homemade ice cream, is there? I remember my grandmother churning fresh batches on her porch, and that scent of vanilla and sugar still brings a smile to my face. Often, we crave that nostalgic goodness, but the thought of a complicated recipe can put us off. That’s exactly why I perfected this incredibly simple Ice Cream Recipe (No Churn & Ice Cream Maker Methods), ensuring everyone can enjoy a luscious, freezer-friendly treat without fuss.
Whether you’re a kitchen gadget enthusiast with an ice cream maker or prefer the magic of a no-churn method, I’ve got you covered. This recipe delivers a consistently smooth and delightful dessert, perfect for busy weeknights or a special weekend treat. Get ready to impress yourself and your loved ones!
Why You’ll Love This Homemade Ice Cream Recipe
This isn’t just another ice cream recipe; it’s *the* recipe you’ll come back to again and again. For starters, it’s incredibly versatile. You can stick to the classic vanilla bean, or easily add mix-ins to create your own signature flavors.
I’ve personally tested this recipe many times, ensuring both the no-churn and ice cream maker methods yield a perfectly creamy texture. It’s also surprisingly quick to put together, making those spontaneous dessert cravings a breeze to satisfy. You’ll love how simple it is to achieve gourmet results right from your own kitchen.
Ingredients You Need
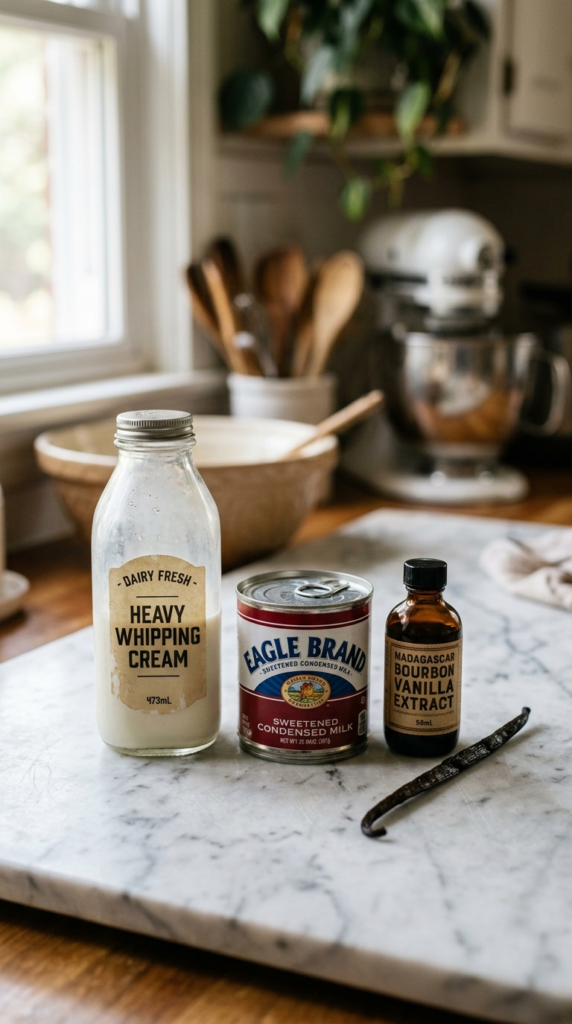
Keeping things simple is key to success in my kitchen. You’ll be delighted by how few ingredients you need to whip up this incredible frozen treat. Chances are, you already have most of these on hand!
Here’s what you’ll gather:
- Heavy Cream: The backbone of our creamy texture.
- Sweetened Condensed Milk: Provides sweetness and richness, especially crucial for no-churn.
- Vanilla Extract: Essential for that classic flavor. Use good quality!
- Pinch of Salt: Balances the sweetness beautifully.
- Optional: Vanilla Bean Paste or a scraped Vanilla Bean for an extra gourmet touch.
That’s it! Minimal ingredients for maximum flavor and satisfaction.
How To Make It
Let’s get to the fun part: making your own ice cream! I’ll walk you through both methods, so choose what works best for you and your kitchen. The core idea is simple: combine, chill, and freeze.
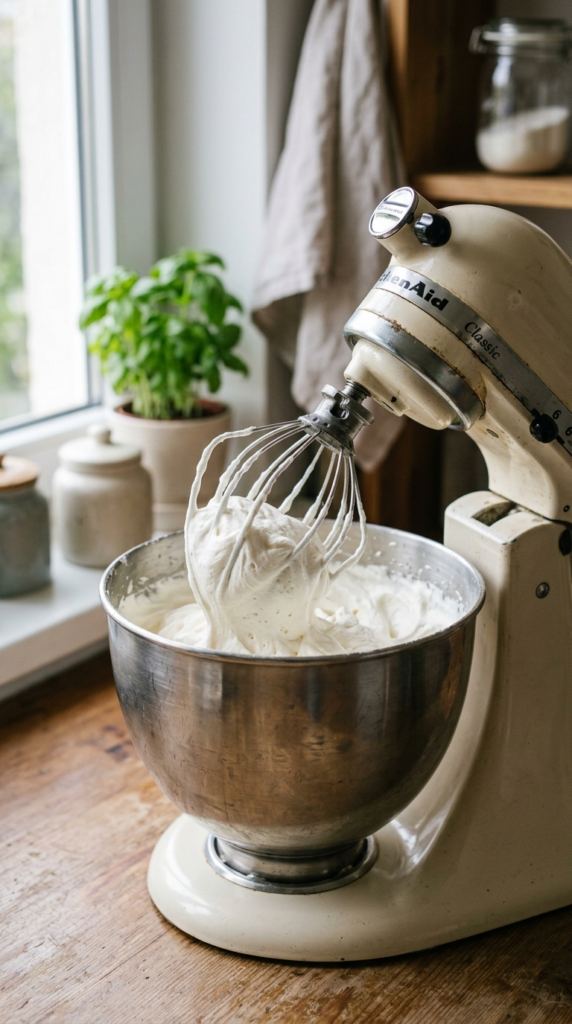
For the no-churn method, we’re essentially whipping air into the cream, which then traps it when frozen, giving you that lovely scoopable texture without needing a machine. With an ice cream maker, the machine does the churning and freezing simultaneously, breaking up ice crystals as they form. Both result in a delicious homemade frozen treat!
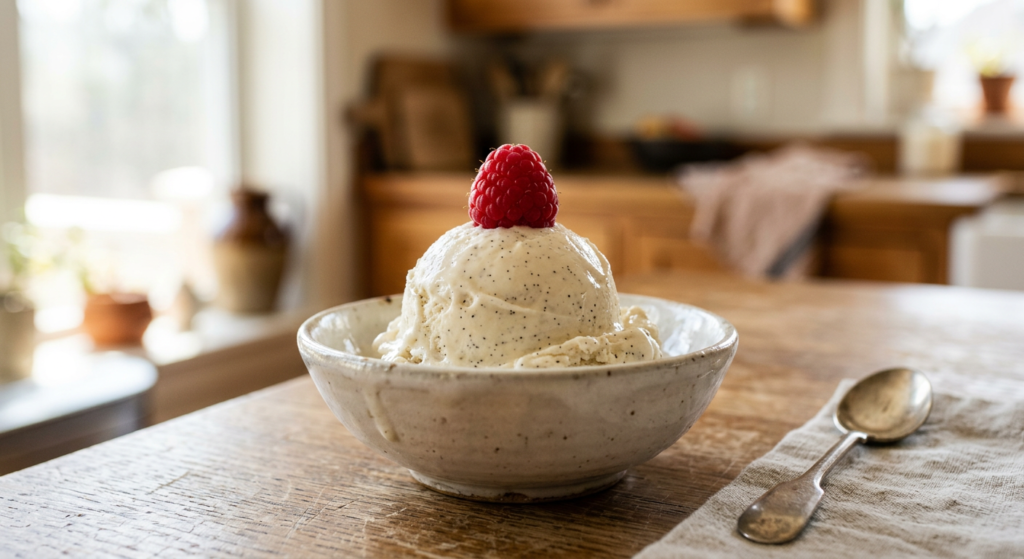
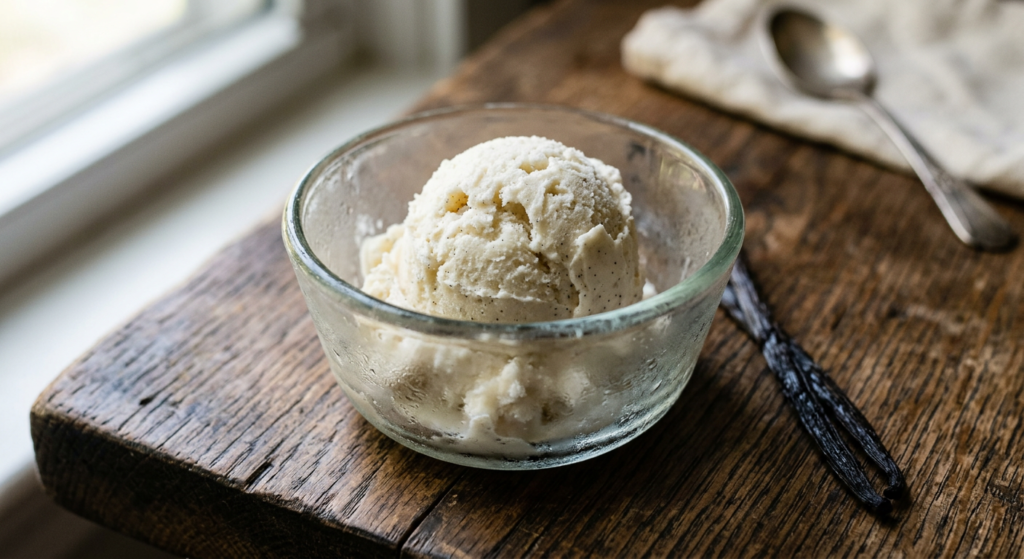
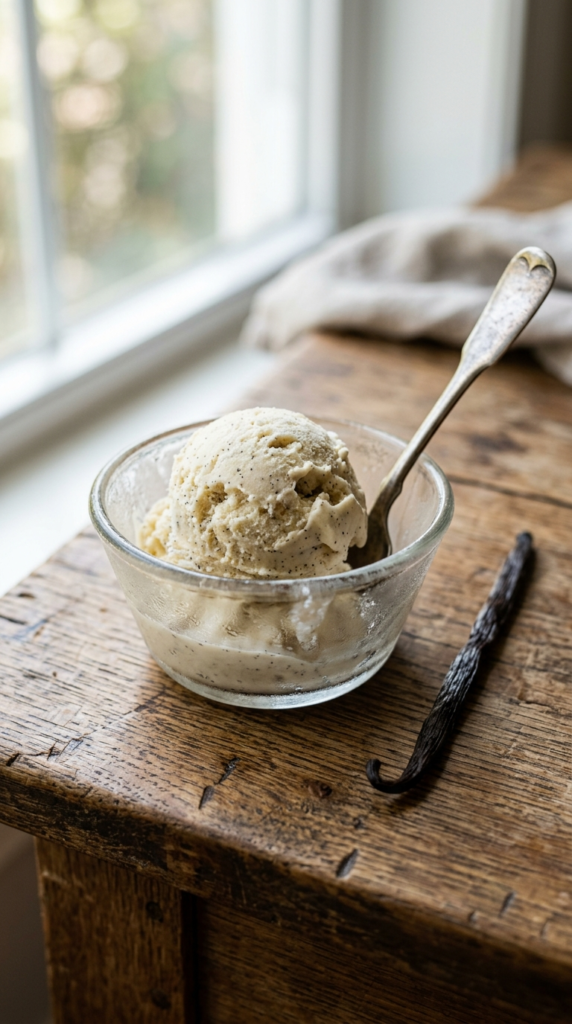
Vanilla Bean Ice Cream
Prep Time: 15 minutes
Freeze Time: 6+ hours
Total Time: 6 hours 15 minutes
Servings: 8-10
Ingredients
- 2 cups (480ml) heavy cream, very cold
- 1 can (14oz/397g) sweetened condensed milk
- 1 tablespoon good quality vanilla extract
- Pinch of salt
- Optional: 1 teaspoon vanilla bean paste or seeds scraped from 1 vanilla bean
Instructions
- Prepare Your Base: In a large mixing bowl, combine the sweetened condensed milk, vanilla extract, salt, and optional vanilla bean paste/seeds. Whisk gently until fully combined.
- Whip the Cream (No-Churn Method): In a separate, very cold bowl (I like to chill my bowl and whisk attachments for 15 minutes), whip the cold heavy cream with an electric mixer on medium-high speed until stiff peaks form. Be careful not to over-whip.
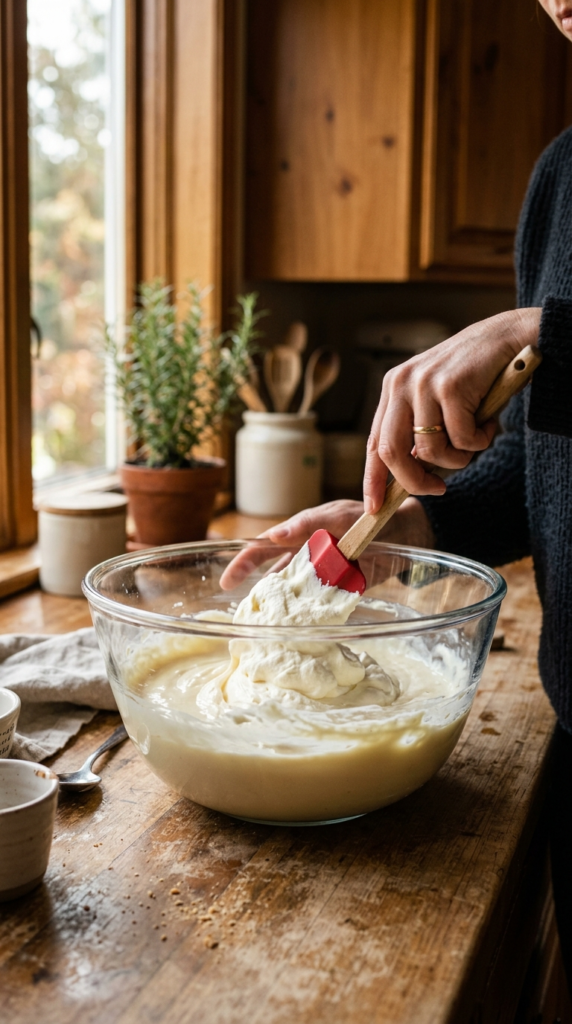
- Combine (No-Churn Method): Gently fold about a third of the whipped cream into the condensed milk mixture to lighten it. Then, carefully fold in the remaining whipped cream until no streaks remain. Be gentle to keep the air in the mixture.
- Freeze (No-Churn Method): Pour the mixture into a 9×5 inch loaf pan or an airtight freezer-safe container. Cover tightly with plastic wrap (press it directly onto the surface of the ice cream to prevent ice crystals) and then with a lid or foil. Freeze for at least 6 hours, or preferably overnight, until firm.
- Prepare for Ice Cream Maker (Ice Cream Maker Method): Combine heavy cream, sweetened condensed milk, vanilla extract, salt, and optional vanilla bean paste/seeds in a bowl. Whisk until fully combined and smooth. Cover and chill this mixture in the refrigerator for at least 2 hours, or preferably overnight. A very cold base churns best.
- Churn (Ice Cream Maker Method): Pour the chilled mixture into your ice cream maker bowl (which should be pre-frozen according to manufacturer instructions). Churn for 20-30 minutes, or until the ice cream is thick and resembles soft-serve consistency.
- Freeze (Ice Cream Maker Method): Transfer the churned ice cream to an airtight freezer-safe container. Cover tightly and freeze for another 2-4 hours, or until it reaches your desired firmness.
- Serve: Let the ice cream sit at room temperature for 5-10 minutes before scooping, especially if it’s very firm. Enjoy!
My Kitchen Tips
After countless batches of homemade ice cream, I’ve picked up a few tricks that make all the difference. First, always make sure your heavy cream is *super* cold for the no-churn method. This helps it whip up faster and hold its volume better.
For the ice cream maker method, chilling your base mixture thoroughly is non-negotiable. The colder the base, the better it churns and the creamier your final product will be. I also find that adding a splash of vodka or a tablespoon of corn syrup can help keep homemade ice cream softer and less icy in the freezer. Don’t worry, you won’t taste the vodka, but it does wonders for texture!
Storage and Make Ahead
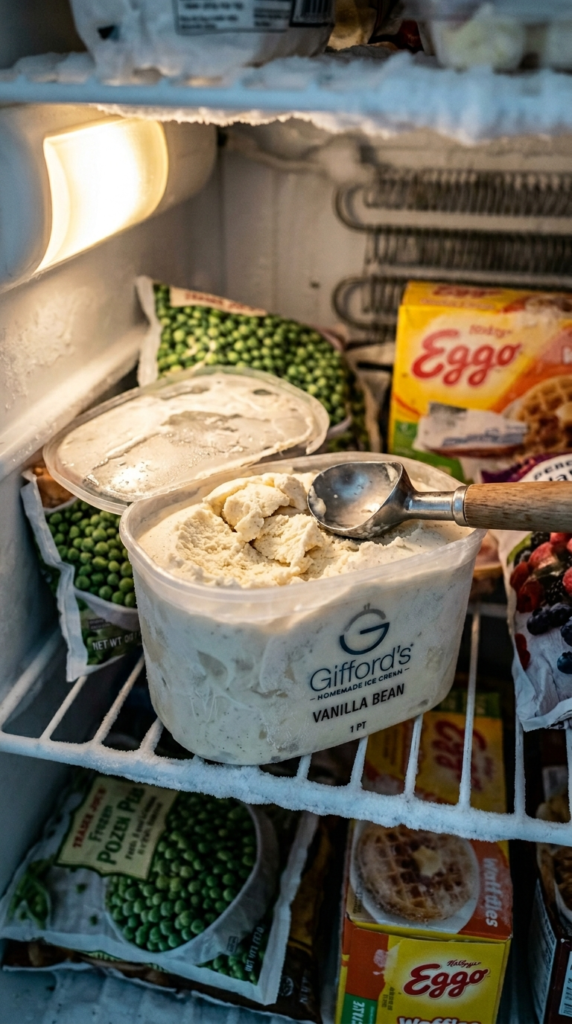
One of the best things about making your own ice cream is having it ready in the freezer for whenever a craving strikes! Once your ice cream is frozen solid, make sure it’s stored in an airtight container. This helps prevent freezer burn and keeps it tasting fresh for longer.
My ice cream typically lasts beautifully in the freezer for up to 2 weeks. Beyond that, the texture might start to degrade slightly, but it’s usually devoured long before that happens! You can absolutely make this a day or two in advance of when you plan to serve it. It’s a perfect make-ahead dessert for parties or family gatherings.
Variations
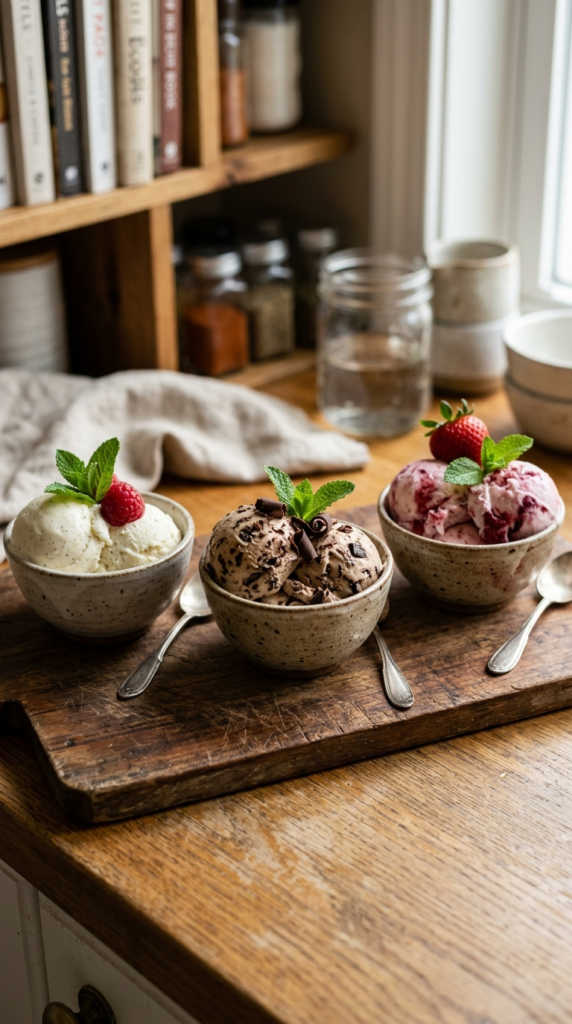
This basic vanilla ice cream recipe is a fantastic canvas for your creativity! I love experimenting with different flavors, and these are a few of my favorites that use the same base. To satisfy your sweet tooth cravings, try these:
- Chocolate Chip: Fold in 1 cup of mini chocolate chips or chopped chocolate after the final mix, before freezing.
- Cookie Dough: Add 1/2 cup of safe-to-eat cookie dough chunks to the mixture.
- Strawberry Swirl: Swirl in 1/2 cup of homemade strawberry compote after transferring the mixture to the freezer container.
- Coffee: Dissolve 2 tablespoons of instant espresso powder in the condensed milk mixture before combining.
- Mint Chocolate Chip: Add 1/2 teaspoon peppermint extract and 1/2 cup finely chopped dark chocolate or mini chocolate chips.
The possibilities are truly endless! Have fun creating your own signature flavors.
There you have it – my tried-and-true Ice Cream Recipe, adaptable for both no-churn and ice cream maker methods. I hope this brings a little extra joy and deliciousness to your kitchen. There’s truly nothing more satisfying than knowing you created something so wonderful from scratch.
Go ahead, give it a try this week! You’ll be so glad you did. And when you make it, snap a picture and share it with me! I love seeing your creations. Don’t forget to save this recipe for later on Pinterest, so you can easily whip up a batch whenever the mood strikes!